
EXPERT REVEALS 4 SIMPLE WAYS TO STUNNING SUNSET PORTRAITS
Taking a sunset portrait can be a daunting feat. It presents one of the most challenging lighting scenes in photography. But, if you can master the sun you can take some breathtaking photos – and here’s how.

WHY ARE SUNSET PORTRAITS SO HARD TO TAKE?
Before I explain how to, let’s take a quick look at why the sunset portrait can be so tough. Firstly, your camera’s sensor is an astonishing bit of kit, but it’s not without its limitations.
Dynamic range refers to the ratio of light and dark that your camera can capture in a balanced way. The higher the DR the more chance you’ll be able to capture details in both darker and lighter areas, I.E. your subject and the sunset itself.
While one way around this is HDR (High Dynamic Range), available on some cameras, most modern smartphones and a lot of TVs and screens, it often leaves your images washed out or artificial looking – and not in the good way.
That means we are left with a scene where we have to start either balancing the light from behind and in front of your subject, or turning to more creative results.
I’m going to share my favourite tips for dealing with direct sunlight and nailing these stunning dynamic portraits.
Table of Contents
OVERPOWER THE SUN WITH OFF-CAMERA FLASH
This is probably the holy grail of stylish sunset portraits, but it’s also the most complicated. Using off-camera flash can be intimidating when you’re starting out, but it’s really simple, honestly!
The joy of using off-camera flash is that you control the lighting and dictate the scene. Ordinarily, exposing for the sunset in the background would leave your subject in a dark silhouette. In the above image I’ve used flash to pick out details in the upper body, letting the light fall off lower down the legs.
The good news is that, although you will need a flash, it’s actually very simple to use, even as a beginner. For the above shot I used the Godox AD600BM (you can read my full review here) and a small 90cm octabox like this.
HOW DO YOU USE FLASH TO OVERPOWER THE SUN?
Without going into the crazy science, such as the inverse square law, or the numerous lighting patterns, the basics of using flash is very simple! As long as you have your flash (a cheap flash gun will work, but it’s not as powerful so you’ll have to experiment a little) and modifier, a trigger/receiver system and a light stand, you’re ready to go!
The first thing you need to do is take a measurement of the ambient light. You could use a light meter like the Sekonic Flashmate L-308X, but I’d recommend you save your money and eye ball it since cameras are now built with very capable internal light metering modes.
You can meter for your background in any Aperture or Shutter Priority auto modes. Simply point your camera at the brightest part of your image and take note of the settings. Once you have those, switch your camera over to the Manual mode and dial them in.
Now you just need to take a photo with your subject in position. It doesn’t matter if they’re dark, you just want to make sure the sky and background are correctly exposed. Once you’re happy, it’s time to bring the flash into play.
Position your flash where you need it. I recommend having it just out of frame, 45 degrees away from the camera left or right and 45 degrees above your subject’s head. Now dial in the settings until your model is correctly exposed – plenty of test shots required.
Voila, you have now balanced out the ambient and flash light. You are a master flash photographer! Don’t forget to keep reviewing your shot on the camera’s LCD screen. If you’re unsure, check your histogram (you can usually find it in the display settings). It should look well balance with a level ‘table top’ across the whole graph. This means you have a balanced exposure.
Happy shootin’.
USE A REFLECTOR TO BALANCE YOUR LIGHT
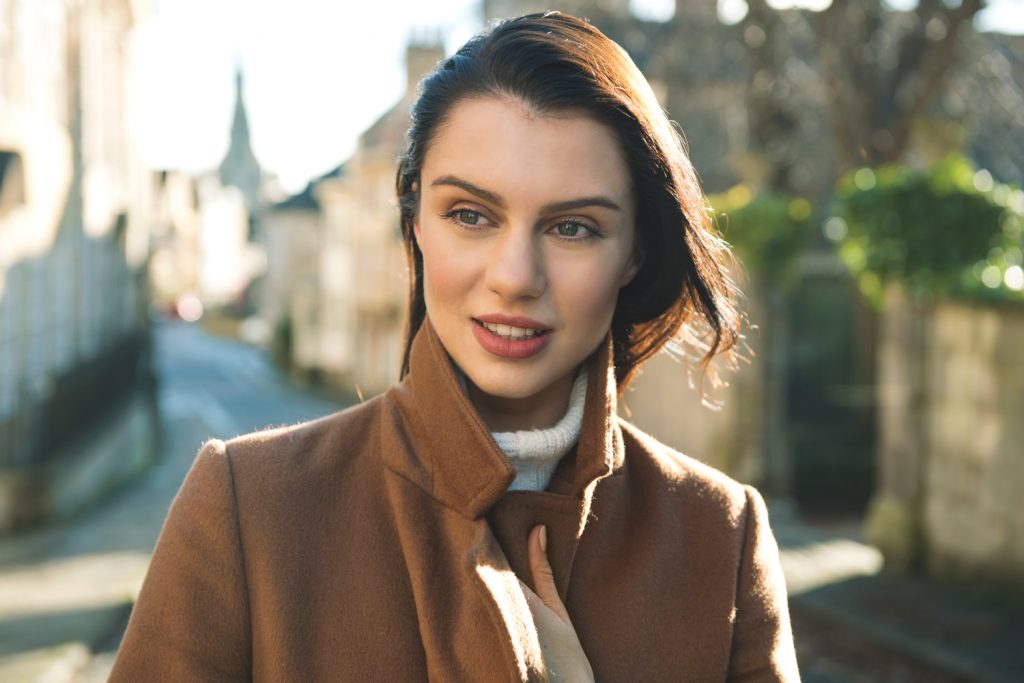
Don’t fancy going down the flash route? You’re in luck. Since before the invention of the light itself – probably – photographers have been relying on a bit of shiny fabric to help illuminate their subjects.
Ok, probably not that long, but the reflector is your handy pack-and-go portrait accessory that is extremely powerful for a fabric disc.
The basic ones tend to come as circular discs which can be folded into a small pack (if you ever figure out how – I didn’t!) and chucked into your kit bag. When you need it, just like a pop up tent, take it out and phwooom!
They come in a range of different flavours, but you’d do well to make sure you get yourself one like this (I’d recommend either 80cm or 110cm versions). It’s got a reversible cover which provides silver, black, white and gold, and a central white diffuser.
It also comes in a nifty bag, but the next question is…

HOW DO I USE A PHOTOGRAPHY REFLECTOR?
Using a photography reflector is so simple it would literally take longer for your granny to learn how to suck eggs. You just hold it facing towards the light and make sure said light bounces back onto your subject. Done.
Sounds simple, but there are a few things to consider. I previously mentioned four colours and a diffusion panel, but what do they do?
The Silver and Gold are both reflectors natural. They bounce back the most amount of light, with silver returning a neutral light colour and gold returning, well, a warmer golden colour.
White and black are a bit more nuanced. The white side is still a reflector, but it’s for close up work and doesn’t bounce nearly as much light. It’s much softer and more diffused so doesn’t leave a large patch of hard light. This is perfect for close work when you just want to reduce the shadows on one side of the face (or whatever you’re shooting).
The black side is called a flag. This means it’s a negative reflector, essentially, and is used to take light out of the scene. Not literally, obviously, but if you hold this close to your model it will reduce any ambient light coming onto that side of the face. This is great if you’re trying to deepen some dramatic shadows, for example.
The white diffuser, found when you take off the cover, is just that. It doesn’t reflect light but actually lets some through. It diffuses the light and makes it softer at the cost of also reducing the light’s power. If you find yourself with really harsh shadows from the sun, hold this between the solar annoyance and your model and you’ll create pleasing shade and a softer light distribution.
Now you know all of that there is one more thing to think of. Reflectors on a sunny day can be extremely powerful, acting as a smaller light source. As such, you should use them like you’d use any light – from above and to the side. It’s very easy to hold it on your hip, but you will create underlit horror lighting… keep this in-mind.
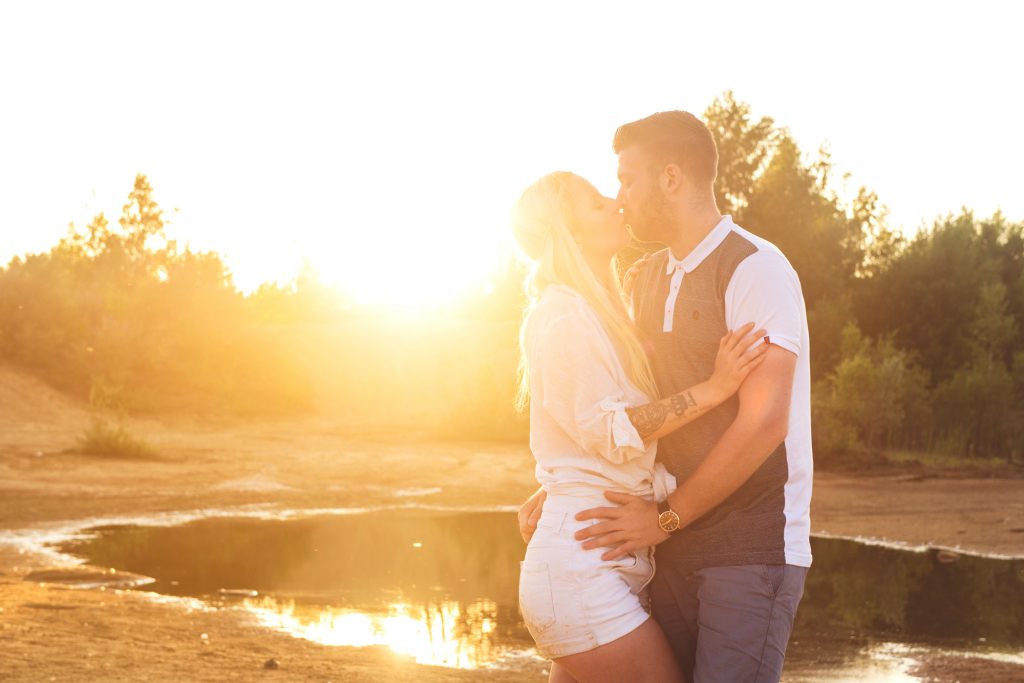
SHOOT INTO THE SUN AND EMBRACE THE FLARE
Remember that one oh so smart chap or chappette who’s always shouting ‘don’t shoot into the sun’? Well, they’re wrong. Very wrong!
Cameras have become so advanced in the digital age that this isn’t as much of a problem now. Firstly, unlike film, it’s far easier to recover shadows and lighten them in editing.
Secondly, have you ever seen how gorgeous flares and haze are? They create my favourite sunset portraits and really add mood.
Being smart with framing and position and adding in a couple of tricks can help you control flare and create dreamy contemporary portraits.
HOW DO I SHOOT PORTRAITS INTO THE SUN?
In essence, put your model between you and the sun and click.
There are a few things to consider though…
Some cameras (especially older ones that use contrast AF) may struggle focusing. A lens hood can help here, but I tend to hold my hand over the top of the lens, just out of view. This hides the sun long enough to lock in focus. Then I remove my hand and shoot.
If the sun, or any light source, is pointing directly into your lens you will lose a lot or contrast and clarity. This means you need to figure out how to have the sun in play, but not fully in play.
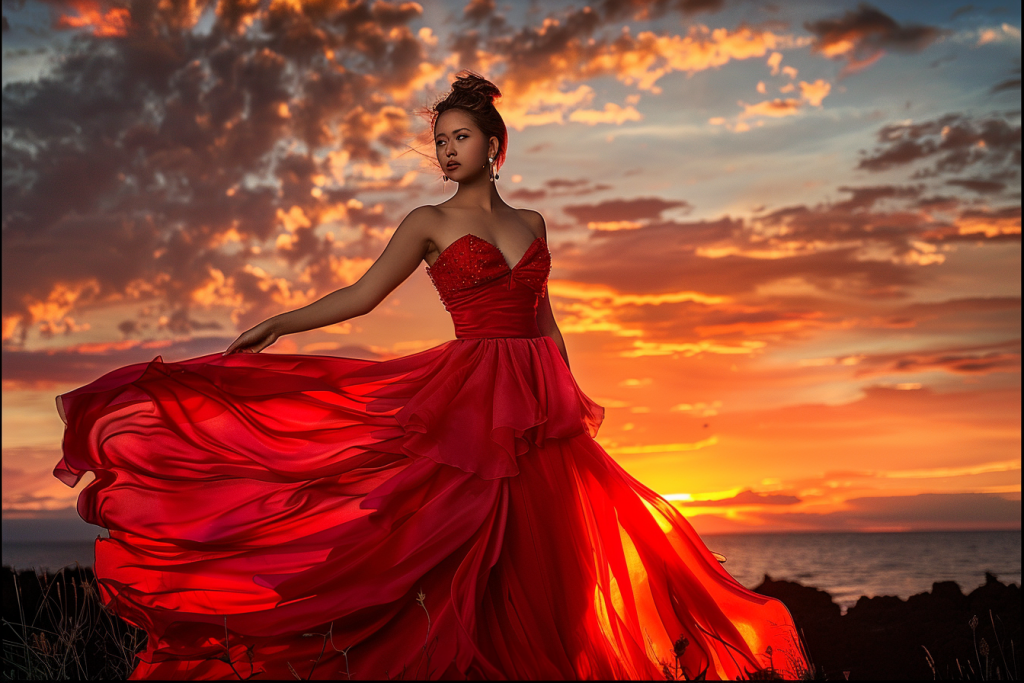
I really like using the model to break the line of sight. Position yourself until the sun is behind your subject and slowly move your camera until the sunlight starts to break out from behind them. This can create anything from a warm glow to sun stars.
Wrapping the warm sunset light around your portrait subject gives a dreamy feel and always adds something to your shots.
You can also use elements in the background to achieve the same effect, such as buildings or trellises in the distance.
The other framing tool you can use is the very edge of your lens. Again, have the sun close to the edge of your image and move the camera slightly. Once it starts to leave frame you’ll still have plenty of haze and flare to play with.
Now you just have to frame in a way that’s more pleasing and take the shot.
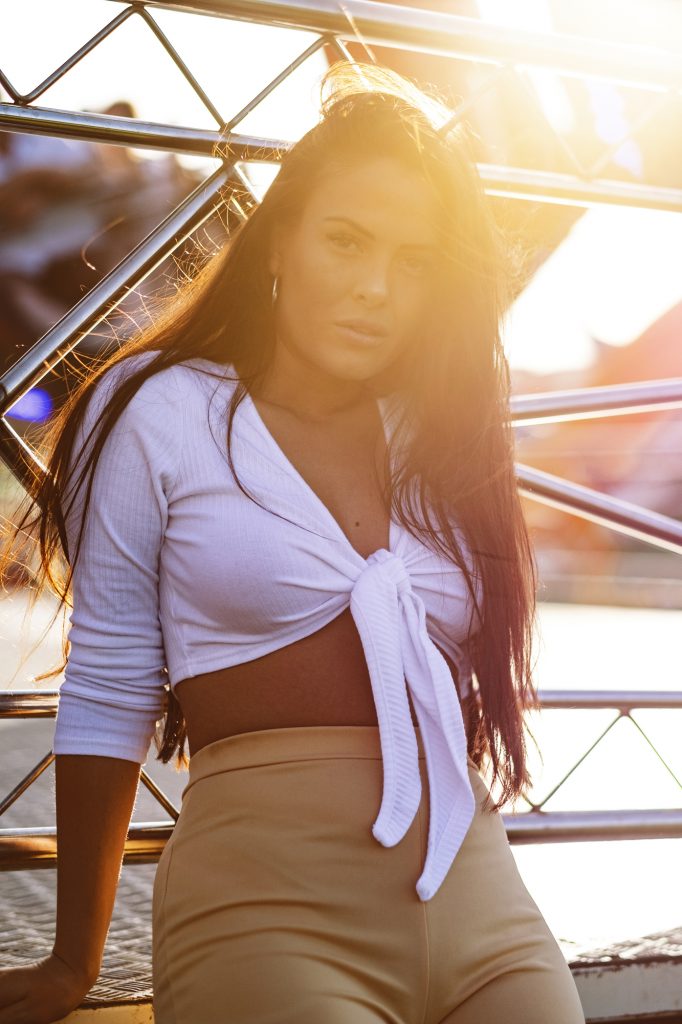
USE THE SUN AS YOUR OWN LIGHT SOURCE
Maybe even more obvious than just shooting toward the sun, but this one flips it on its head.
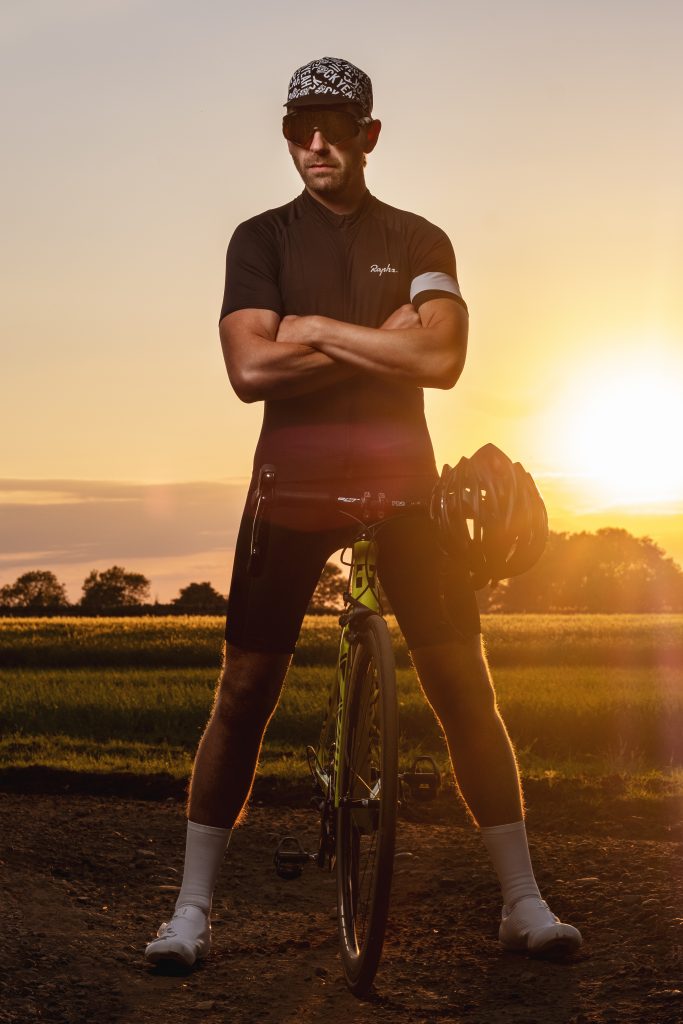
Turning yourself around and placing the sun behind you at golden hour will create a powerful light source. It can be a very harsh light, but the warmth of its colour is never one to discount.
The big benefit of this ultra-directional light is that it also casts plenty of shadows and will rarely leave your image looking flat or boringly even.
If you use it wisely, you can really make your subject standout against a darker background for a striking shot.
HOW TO TAKE PORTRAITS IN HARSH SUNLIGHT
For best results treat this like any other light. Just be aware of the pitfalls of harsh light.
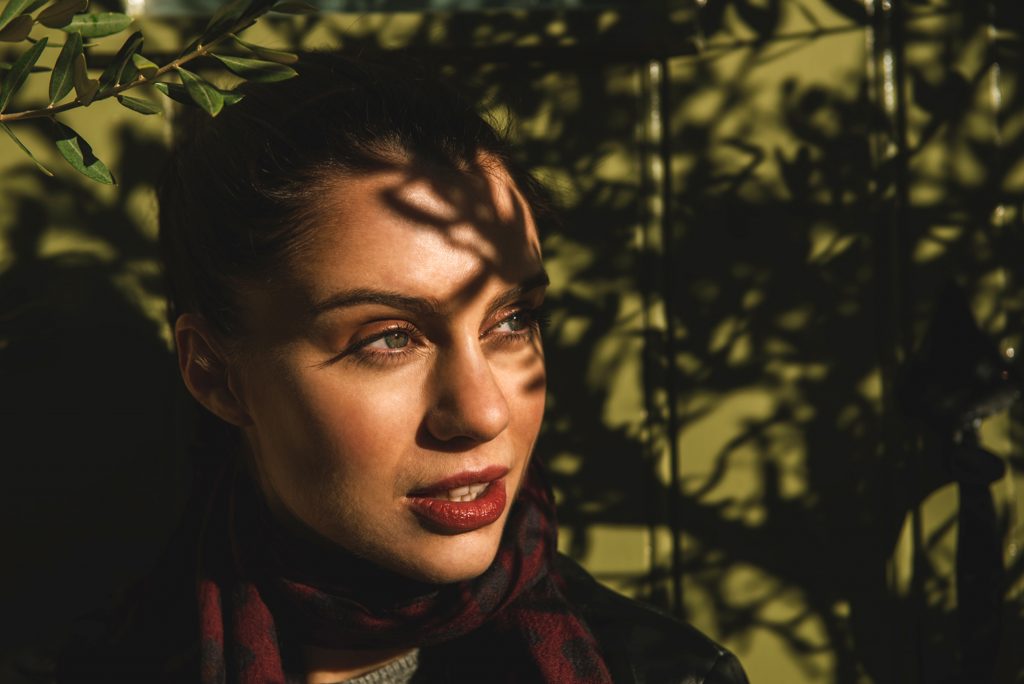
Since the sun is a small light source, it will cast sharp and hard shadows which aren’t usually flattering for your subject. This means you have to be hyper-vigilant when you’re framing up. Though some styles, like street photography, lend themselves well to this look.
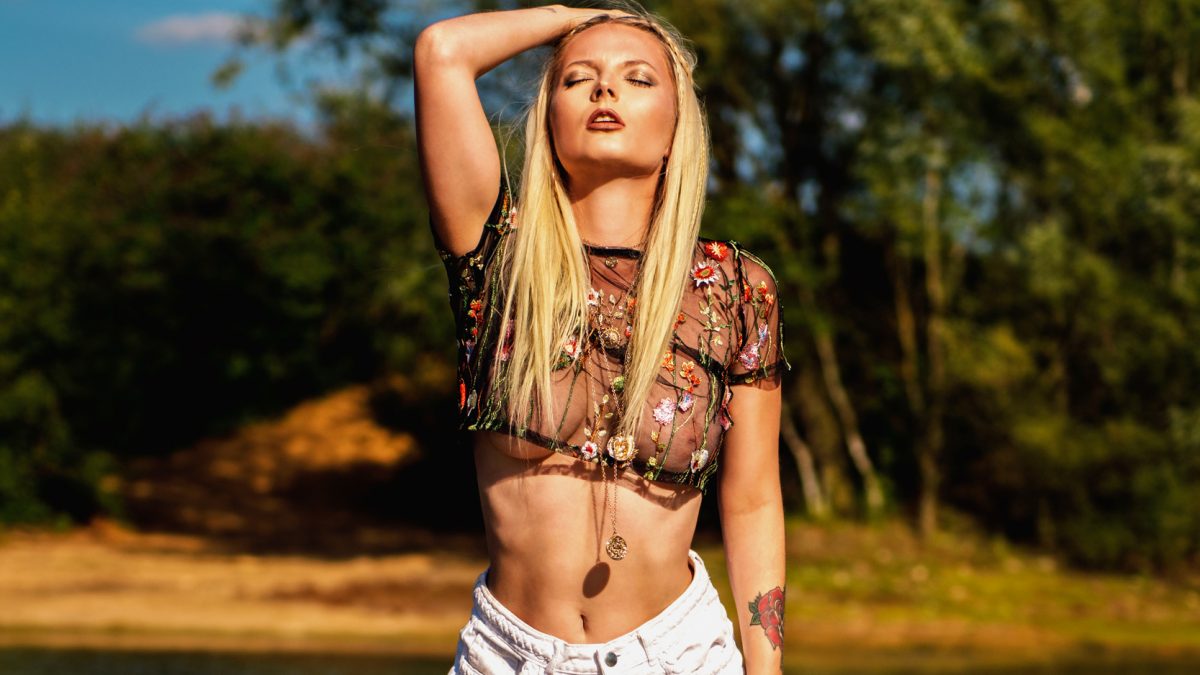
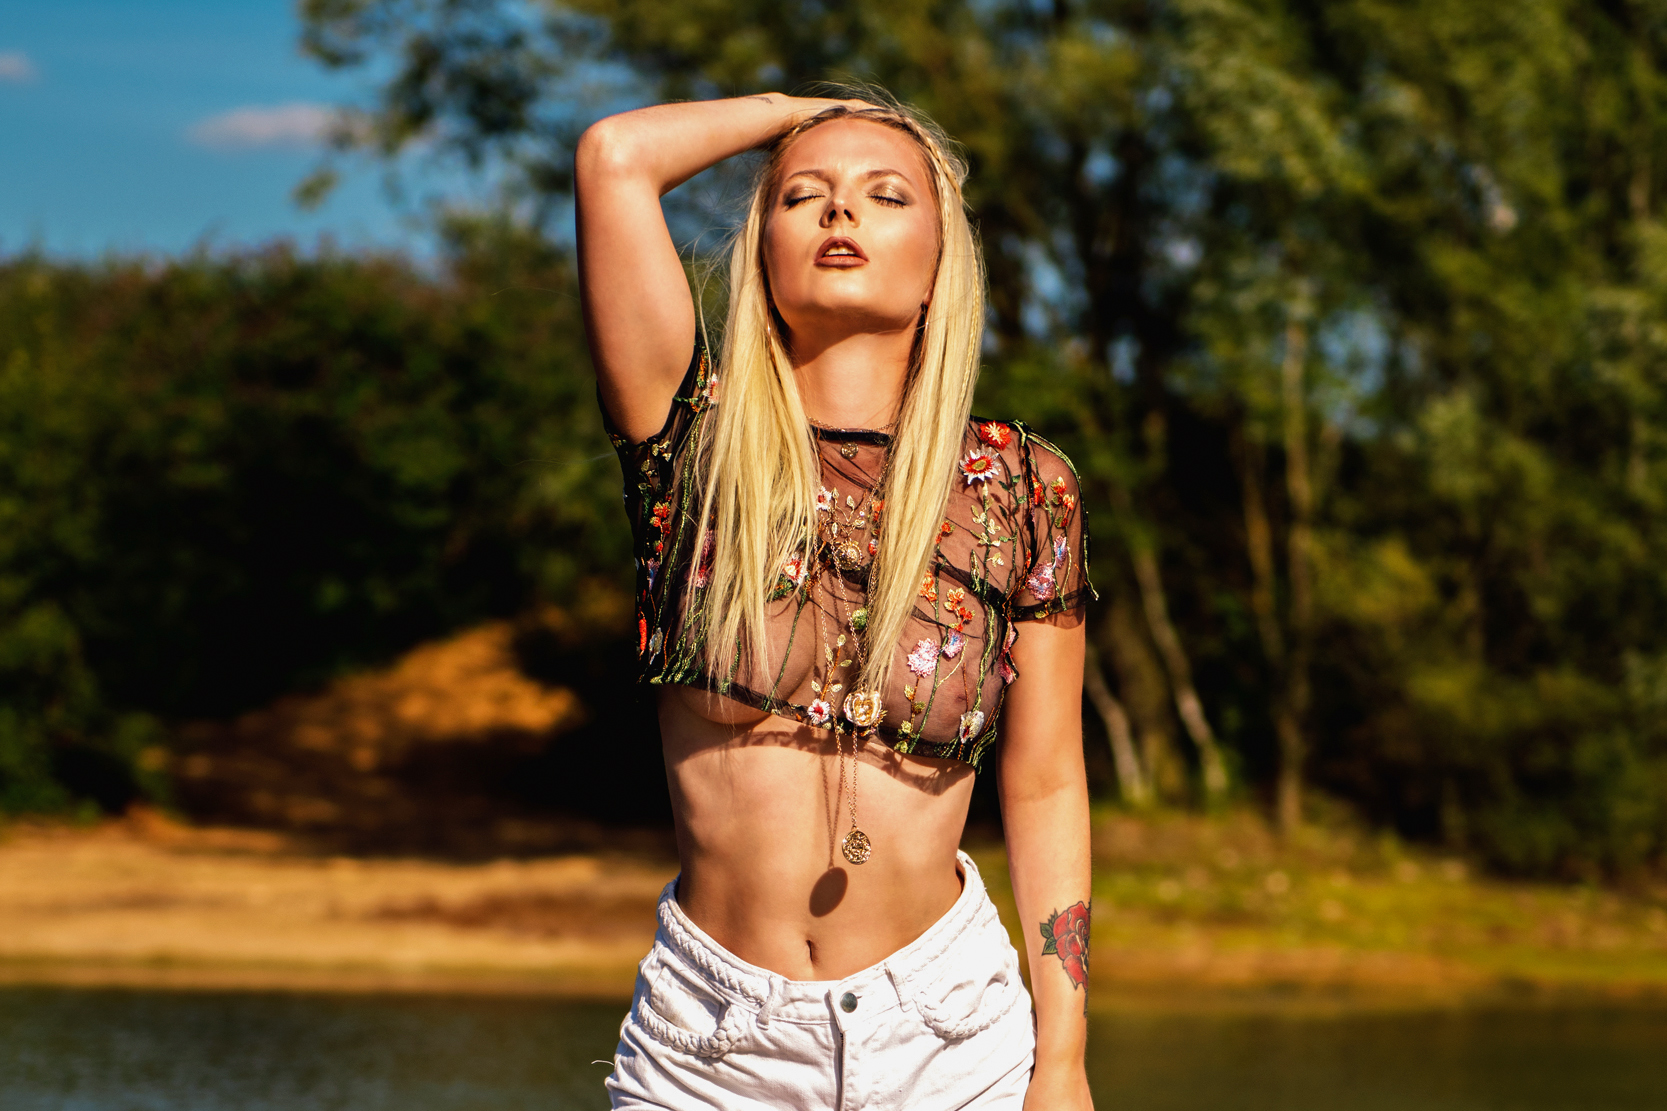
In the case of the image at the top of this section, I let the sun strike the model directly in the face (this doesn’t suit everyone), but positioned her behind some overhanging leaves to create a shadow pattern. Using the harsh nature of the sun’s light can be a great way to spice up your backgrounds.
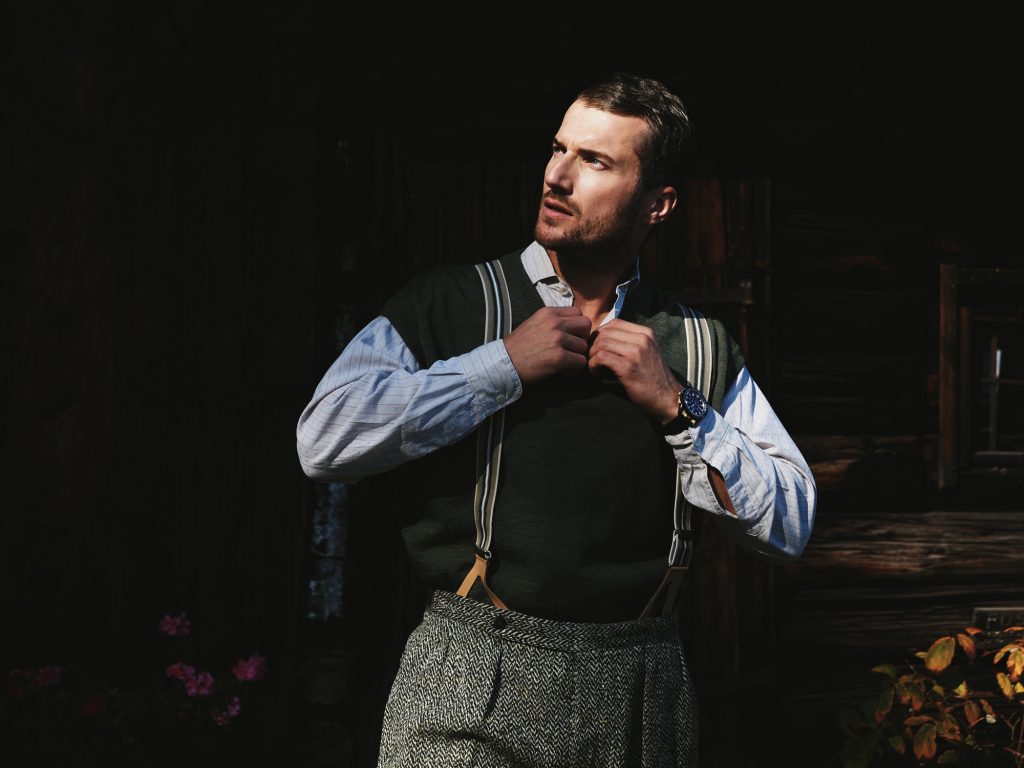
Alternatively (as above) I adore finding a sliver of sun that illuminates a single spot while the rest of the scene remains in shadow. This can lead to outstanding isolation for your subject.
To take advantage, you need to make sure you expose for the brightest part of the image (usually the face) and let the rest of the scene go dark, like a reverse silhouette. You can see this in the above image (the background is a log cabin if you were wondering).
This works really well for street photography, but can also create amazing images if you get macro with your approach. Instead of a wider scene, use the light to illuminate just an eye, for example.
Finally, this is also the perfect use for a scrim (semi-translucent fabric panel). You can get huge, expensive ones that block out a large area, or you can use the inside of a reflector (see above).
Using this last method will ensure you get the benefit of that gorgeous warm golden hour glow, but also ensure you have an even, soft shadow fall.
Happy sunset shooting and thanks for reading.

Stay connected