
THESE CHEAP ACCESSORIES WILL CREATE BETTER PORTRAIT PHOTOS

Portrait is my favourite genre of photography and over the years I’ve played with a range of techniques and gadgets and hacks. Thanks to being permanently broke, I’ve always looked for budget workarounds and have come up with quite a collection. These are my top portrait cheap portrait photography accessories that will make a massive impact without spending an absolute fortune!
Table of Contents
BATTERY-POWERED FAIRY LIGHTS - £9
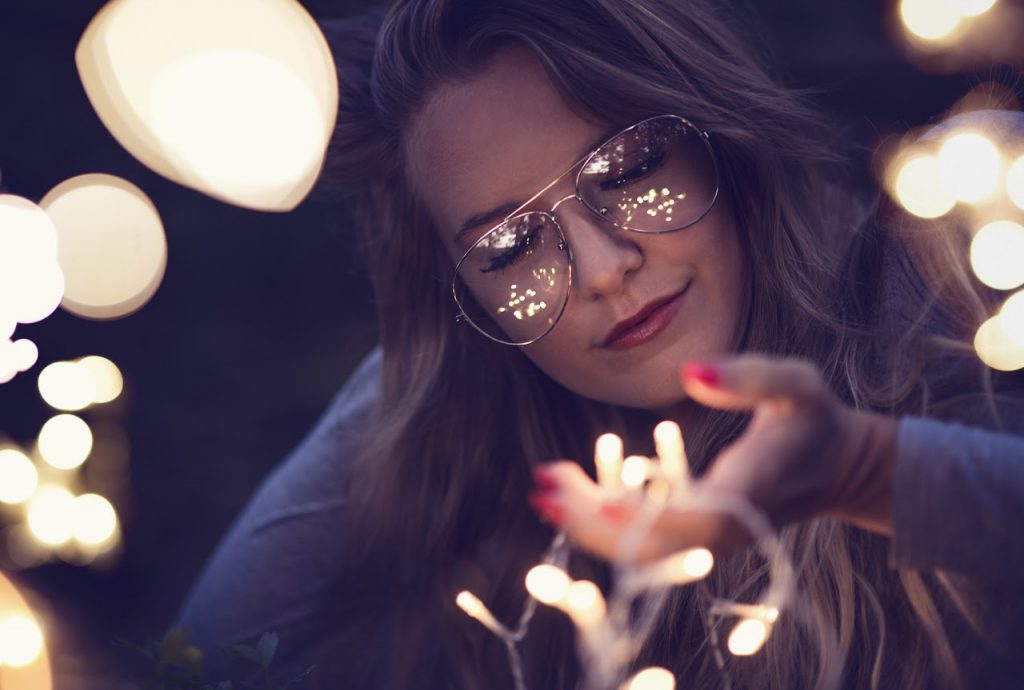
Fairy lights are a nice easy start. Chances are you have some in your Christmas stash in the attic. If you don’t they’re the literal definition of cheap photography accessory and easy to grab from Amazon, like this 16ft set. You want them to be fairly long for extra flexibility. The power pack takes three AA batteries (they tend to last for a while) and the IP65 rating means it should be ok in the occasional shower.
I personally love doing two things with these. Either training them from the front of my lens (all the way to the background) or group them in a ring and hold over the front lens element, both of which creates the extreme bokeh you see above.
The other way I like to use fairy lights for portraits is by adding them into the background of a bare studio shot. As long as you have a dark background (don’t illuminate it with your lighting) and you’re shooting at a wide aperture (F1.4 for example) you’ll create some bokeh to elevate a blank backdrop.
There are so many great examples you can see for inspiration, but it’s a very easy one to play with on the fly! Enjoy.
GOVEE RBG FLOOR LAMP - £99

If you’ve ever seen a good gelled flash portrait you’ve probably muttered a jealous wow (I have). They have a huge visual appeal and really stand out from the crowd. They also require expensive flash units, gel sheets and a lot of trial and error to nail.
Using a continuous RGB light, though not as powerful, gives you instant results. It also means, in the case of the Govee, you can change your colours instantly with the app.
The power output is perfect for a dimly lit room at fast apertures and equally cool when shooting product photos. For the above I mixed it with a Godox AD600BM flash to capture the action (any cheap flash gun shot through a soft box will do the same).
It’s pretty powerful for what it is and it’s got a 16m colour gamut to play with. There’s a lot more features, especially if you do use it as a floor lamp. I am in love with this. It’s not super-cheap, but at £99 you’ll get a lot of creative value from it! You can read my full review here.
NEEWER 6IN TRINGULAR PRISM - £19.50
I don’t know what there is to say about this one. It’s a well-trodden portrait photography accessory and it’s cheap. It ticks both requirements on a cheap portrait photography accessories list.
It’s very much a pyramid-shaped bit of glass that, when positioned in front of your lens and a bit to the side, can create some funky effects. It harks back to the film age and will create light flares and reflections with a hint of double exposure.
Like a kaleidoscope you just keep switching positions and rotating it a bit to get a slightly different effect. They’re always cool, they can really help fill negative space and it’s small enough to keep in your kit bag!
If you’re shooting in natural light, try placing this in front of your light source and see if you can project a rainbow for some added value!
The one I’ve linked to is from Neewer, a Chinese photography brand, and it says it’s designed specifically for photography. Honestly, I don’t know what the difference is, but it says it’s made from K9 photography glass and has better light transmission. What have you got to lose?
K&F Concept True Color Circular Polarising Filter (Nano X Series) - £30-75
I’m not going to mug you off with this. I 100% edited the above photo… it has mirrored horses butts for crying out loud! Can’t deny that. However, it started life with a deeply rich blue sky, and that’s thanks to a polarising filter.
I’ve gone with the K&F because it’s the last one I bought, the quality is great – I.E. I don’t notice it being on there, and it’s permanently stuck on my lens. But what is a polarising filter and what does it do?
There’s a whole weird history that involves dog urine, Polaroids and sunglasses… one for another time. Officially, a polarising filter does science stuff with wavelengths or something. But in practice, it makes your skies a deeper colour, can cut out reflections in water or on windows or metal, and is probably the most versatile on-camera filter you can buy.
There is a bit of a learning curve. For best results you want to be around 90 degrees from the sun. You also have to rotate the filter, while on-camera, to find the sweet spot. Don’t worry, you’ll be a master in five minutes!
Cheaper versions are available, but this one comes with a nano-coating, has really good transmission and doesn’t darken your shots by a noticeable amount. The images are still crisp with bags of details and there’s no colour cast.
There are reports of it getting a bit stiff. I haven’t had an issue with mine, but don’t over screw it! Also make sure you choose the correct diameter to match your lens, 55mm, 62mm, 77mm etc. You can find your lens’ diameter with a quick google search if you’re not sure.
If you want a cheaper version, you can try the Nano K version, also linked below. In all honesty, there’s probably very little difference, so save yourself some cash if you’re struggling.
FLOWERS - FREE IF YOU HAVE A GREEN-FINGERED NEIGHBOUR...

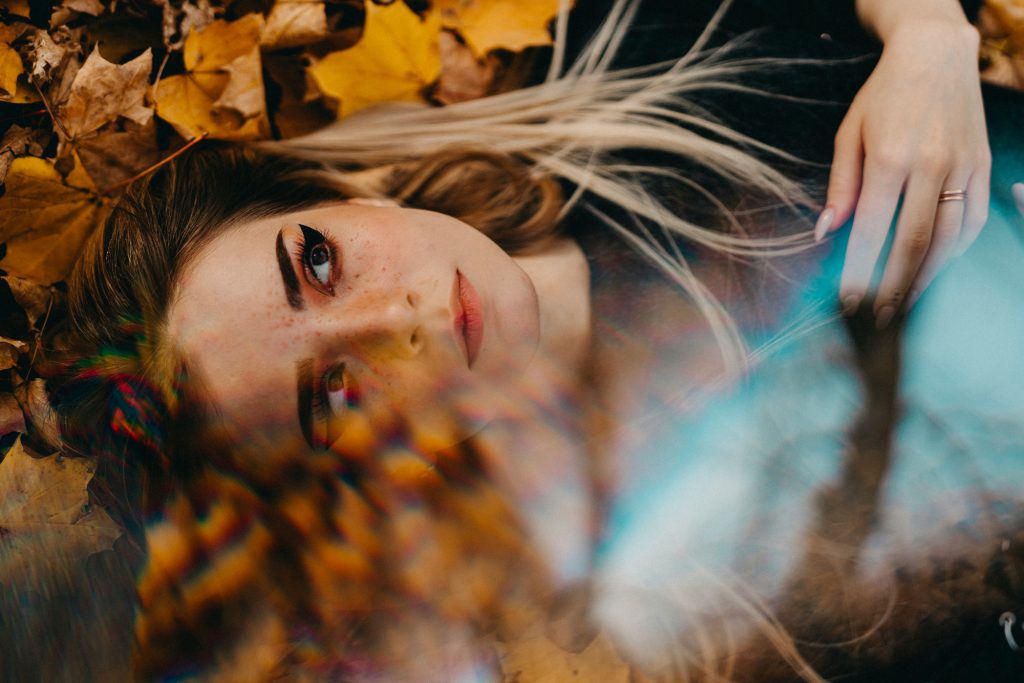
Can’t get cheaper than free! When I say flowers, I mean anything leafy, but a vibrant-coloured petal would be just as good.
As with a few things on this list, it’s going to be another hold over lens job, so ideally something with enough stem to keep your fingers out of view. But holding this directly over your lens while shooting at a fast aperture (F1.4, 2.8, 4 etc) will completely blur it out and give a cool colour leak effect.
The above was from a sunflower which was part of a bouquet I bought for props, but honestly, I’ve used everything. Buddleias produce a very cool deep purple, but get experimental depending on the colours in your scene.
Also, if you’re too tight to buy them as props – shame on you! – just grab them from the wilderness. It’s free, it’s simple, it’s effective. Job done.
PROP AVIATOR GLASSES - £10

Not much to write about this. It’s a pair of cheap knock-off glasses. But when it comes to cheap portrait photography props, I love a pair of oversized aviators. There’s a very ‘effortlessly cool’ vibe and it’s perfect for retro and contemporary looks alike.
This pair is cheap so don’t expect the quality of a £200 pair of glasses. As a prop you’ll be fine though.
GLYCERIN - £6
Glycerin? Some weird beauty ingredient? Are you off your nut? Well, yes, but that’s not important right now.
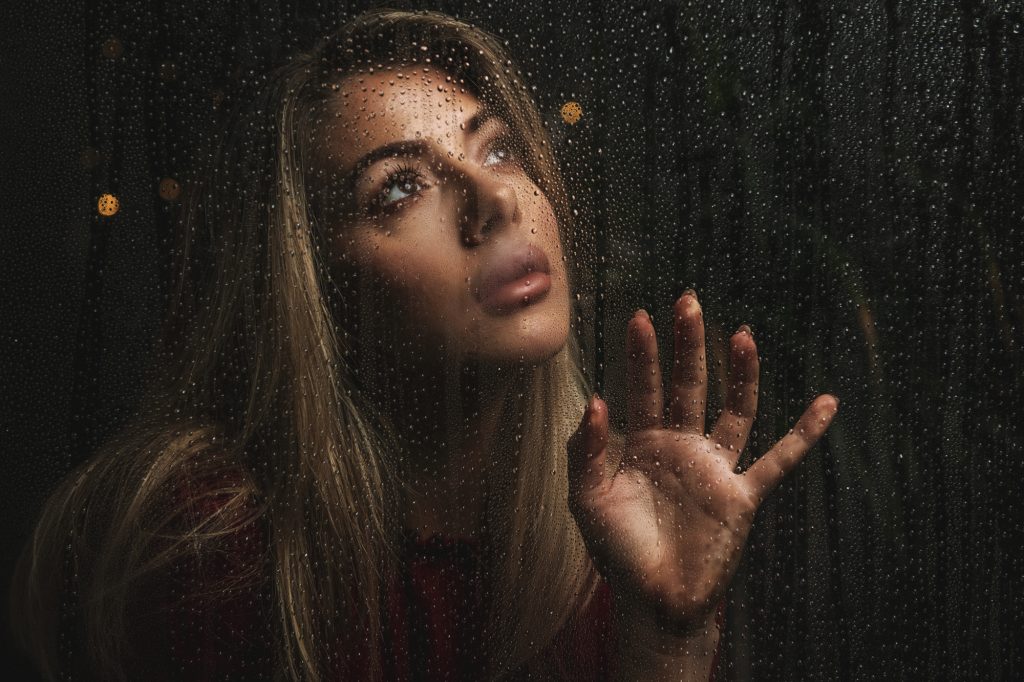
The above shot is entirely fake. The window was a sheet of clear perspex propped up on a picnic table and the bokeh was fairy lights (see the first entry) hung between two light stands. The raindrops were created by using a mix of 50% water and 50% glycerin put into a plant mister set to fine spray.
This mixture beads up, like real water in a rain storm, but will (as I found out through a lax wiping schedule) stay beaded for literally months!
Obviously make sure your model isn’t allergic to glycerin. I recommend doing this while rubbing raw shellfish and eating peanuts… don’t really do that, please!
HOW DO YOU TAKE A GOOD PORTRAIT PHOTO?
Hey, if I really knew that I’d be too busy and rich to be writing this. However, I’ve seen my fair share of good portraits, so I’ll give it a punt…
There’s a lot of subjectivity in photography and portraits are no exception. Some people like flash portraits, others like natural light shots. Highly edited headshots have both lovers and detractors, and the same is true for unedited photos ‘straight from camera’.
The technical answer is an image of a person that’s well exposed with no blown-out highlights or blocked blacks – a well-distributed histogram. You can make your subjects stand out from the background by using a longer telephoto lens with a wide aperture (F1.4 – 2.8, for example). This will let you keep your model in sharp focus while blurring out your background.
You typically don’t want motion blur in your portraits, so it’s a good idea to keep your shutter speed above 1/200. If you can’t achieve 1/200sec, try boosting your ICO to compensate, but be aware that higher ISOs will degrade your image quality.
Of course, technical doesn’t mean creative and all of these rules are primed to be broken in twain! I love adding motion blur to inject a sense of movement. I like adding a lot of contrast to a black and white. I like breaking free and doing what I like, and you should too.
Props and accessories (dare I say cheap accessories) can be used to really elevate your portraits, and adding in styling and good make-up will pay dividends.
Personally, I’m a bit in-between. I think there’s no real wrong answer, it’s whatever makes you most happy. Photography is as much as process as it is a destination. But, there are a lot of ways you can make your portrait stand out and that’s what this list is all about.
WHY YOU SHOULD USE ACCESSORIES IN YOUR PORTRAIT PHOTOGRAPHY
Portraits are still widely loved by audiences. Instagram, Facebook, portfolio sites, they all thrive on people photos. However, there are so many people doing portraits that it’s getting harder and harder to stand out. Adding in a few creative hacks can really make your portraits feel different – and different is good.
I’m looking at a few cheapo hacks that I love using or would love to use. These will range from subtle tweaks to completely changing the feel of your image. They don’t cost the earth but they will help you standout!

Stay connected